Welcome to Earmark Decorative Painting Studio!
Welcome to Earmark Decorative Painting Studio where creativity, passion, enthusiasm and curiosity collide!
In this area of the website, you’ll find information about me, Cheryl Poulin, and my studio as well as the classes and workshops I offer in person.
You'll want to join me in the studio!
If you’re a decorative painting enthusiast or you just love being creative, then you’ll absolutely want to join me, physically, in my studio. We always have a blast!
If you happen to live in Ottawa, Canada or surrounding areas, there are on-going classes to suit your artistic needs. There are classes for beginners without any experience at all and for painters with more experience.
As your instructor, I like keeping up with current trends, mastering new techniques and bringing you as much information as possible. Sharing and teaching is my passion!
Much more than decorative painting!
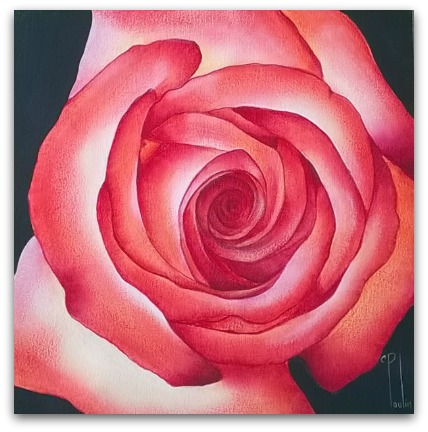
Apart from decorative painting, my studio offers workshops in mixed media, abstract art, tole painting, collage art, paper crafts, altered art, art swaps, artist trading cards, art journals, vision boards and much, much more.
And there's something else that my studio offers... and that's sanctuary. A break from the day-to-day treadmill of life. It's a peaceful, happy place that seems to attract the nicest people.
You may start out painting with strangers but you'll leave with new friends! Guaranteed!
Earmark Decorative Painting Studio
Creative Art Retreats
There are also art retreats for groups which offer some much-needed playful time for learning and relaxing. Ideal for birthday parties, team building experience or just an excuse to get together with friends and share an artsy adventurous experience... even if you don't have any art experience at all!
Can't be with me in person?
If you can't be with me in person, then of course browse the website. There are lots of tutorials, pattern packets, and videos to learn from as well.
As a matter of fact, this entire website has been developed with you in mind. So browse the site and enjoy discovering new things.
Sign up for The Creative Chronicles!
Another way to stay connected with me is to subscribe to my free bi-weekly newsletter, The Creative Chronicles. There's always something of interest going on. Check it out here.
Stay in touch!
To learn more about painting with me here in the studio check out the links or use the drop down menu at the top to learn more about Earmark Decorative Painting Studio.
And of course, you can contact me any time by using the contact form.
Located at 3152 Stonecrest Road, Dunrobin, Ontario, Canada.
Happy painting!
Cheryl Poulin
You Can Paint These Trees and More

Get Your Video Course Now
Introductory Price
Save 55% plus
a Money Back Guarantee


You Can Paint These Trees and More
Get Your Video Course Now
Introductory Price
Save 55% plus
a Money Back Guarantee
Recent Articles
-
Preserving artwork
Apr 18, 24 03:38 PM
Cheryl, Is it necessary to spray artwork with an acrylic spray if I use a quality canvas listed as “archival”? Cheryl, are you still writing newsletters? -
Can you paint more after setting in oven?
Feb 16, 24 06:36 AM
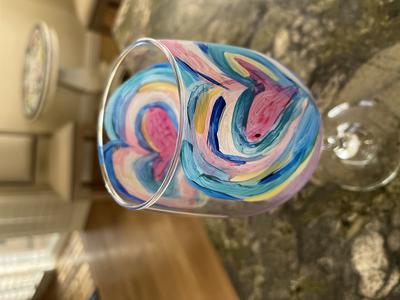
 Hi there I had taken a class and painted a wine glass, then set the paint in the oven. Can I add more paint or designs and re-sent again in the oven?
 -
gallery glass
Dec 11, 23 07:44 AM
Can Gallery Glass be restored if it has thickened? -
gallery glass
Sep 19, 23 07:44 AM
Can Gallery Glass be restored if it has thickened? -
Looking to commission an artist to paint a milk churn for me!
Sep 19, 23 07:43 AM
Greetings I am looking to commission a recognized artist in this field do you or someone you could recommend my name is Lesley Kelly Cell 403 512 8911 -
GLAZE FINISH - what is available now?
Sep 19, 23 07:42 AM
As you said, Delta PermEnamels are discontinued. I would finish off fixing my ceramic vintage pieces with their glaze (either clear gloss or satin). -
Glass Paint Temperature Considerations?
May 15, 22 11:10 AM
I’m wondering how durable glass paint/faux leading is giving shifting temperatures? Or, if some glass paint brands are better for this than others? For
Site Search
| site search by freefind | advanced |


You Can Paint These Trees and More
Get Your Video Course Now
Introductory Price
Save 55% plus
a Money Back Guarantee
New! Comments
Have your say about what you just read! Leave me a comment in the box below.